Sorry for the slow response to this project. 2008 was a hard year myself and my business but we made it through it. I did complete the project and I will work on posting some more pictures soon. I have since sailed the boat on a local lake several times and it was wonderful. It handles perfectly and took to the wind very well. I used a mast from an old sailboat that I purchased from a friend so that made it allot easier to finish. I also used the trailer that old boat was on for mine. I have not had it out in several years now and plan to this spring as soon as the weather breaks it is really cold here now.
Saturday, March 18, 2023
Tuesday, August 12, 2008
Finishing the inside of the boat after fiberglassing the hull
Well it’s been a while since I have posted to my blog but I have still been working on the boat. So I thought I would take a few pictures and put them on so you could see were I was at with the boat. I can tell you that the finish work takes longer than the build part.
I fiber glassed the bottom of the hull and there was lots of days that was just drying time and curing. I have left the bottom smooth finished until later and I will come back and paint it after I complete the paint work on then top. I painted the inside of the boat with the marine paint from Glen L and it has come out pretty nice. I put on several coats of primer first to cover up the wood. It has taken and entire gallon of paint to get the inside of the boat painted and it still needs a final coat. I fitted the deck on the boat and plan to paint it white also. I thought I would finish the last coat on the inside of the boat when I painted the deck. I wanted to paint the inside before putting the deck on so it would be easier to paint. I used a spay gun to paint the inside and will use if for the rest also, it makes the finish look really nice and smooth.
It has taken a lot more paint and fiberglass than I thought it would but it might be because I like to make things really nice and I can be picky about the finish. I am going to fiberglass the edges around the deck and the sides so there will be no possibility of water coming in the sides. I hope to paint the deck and have the inside finished painted this week. I will put the floor and the seating in it next week hopefully. Then I am going to flip it over and finish the bottom after I get my mast in. I want to get the mast in because I am unsure if the bottom of the mast holder needs to bolt through the floor to the outside of the boat. I think it will just screw to it but I am going to wait to finish it after I get a look at what comes with the mast kit.


Wednesday, June 25, 2008
Final Framing and Planking
For the past week or so I have worked to set all the chine logs and finished all the frame work. I made a mistake on the breast hook where the sheer clamp connects to it. I thought it needed to go on the bottom with screw drilled into it. But after looking at it when I started to fit the outside planking I noticed it did not look right. So I cut them loose and moved them to the top side if the boat was flipped upright. That seemed to put everything all into place. I also moved up the Sheer clamps to make them match the stem better. I figured since I had to do all that might as well do it all right.
I also worked on fitting the side planking; I used a paper template for the first one and cut it all out. I put it on my scarfed together plywood sheets that are now 16 foot long. Traced around the template and cut it all out with a skill saw, it all went a lot smoother than I thought it would. After fitting the first one I put it on the other side to see how closely matched it was and it looked pretty good so I used it for a template and cut out the second one. Everything went looks well after being glued and screwed together. I will need to do some Bondo work but that’s ok it will all work out.
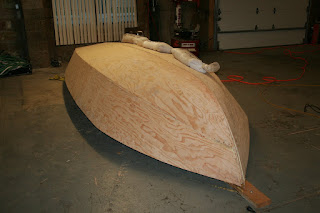
The past few days I fitted the bottom planking on same as the sides. The front bend part is the hardest by yourself. I had to lean on it and drive in a screw as fast as I could, was not much fun but I got it done. I used sandbags to help me hold the last sheet in place since I could not use any clamps to help. I also put in all the screws as I went to help hold it down to the glue better. I think it turned out better than I expected and I plan to start the finish work on the outside to smooth it all up today. I ordered the fiberglass and it should be in this week so I can work on it this weekend.


I also worked on fitting the side planking; I used a paper template for the first one and cut it all out. I put it on my scarfed together plywood sheets that are now 16 foot long. Traced around the template and cut it all out with a skill saw, it all went a lot smoother than I thought it would. After fitting the first one I put it on the other side to see how closely matched it was and it looked pretty good so I used it for a template and cut out the second one. Everything went looks well after being glued and screwed together. I will need to do some Bondo work but that’s ok it will all work out.
The past few days I fitted the bottom planking on same as the sides. The front bend part is the hardest by yourself. I had to lean on it and drive in a screw as fast as I could, was not much fun but I got it done. I used sandbags to help me hold the last sheet in place since I could not use any clamps to help. I also put in all the screws as I went to help hold it down to the glue better. I think it turned out better than I expected and I plan to start the finish work on the outside to smooth it all up today. I ordered the fiberglass and it should be in this week so I can work on it this weekend.


Monday, June 16, 2008
Setting the chine logs
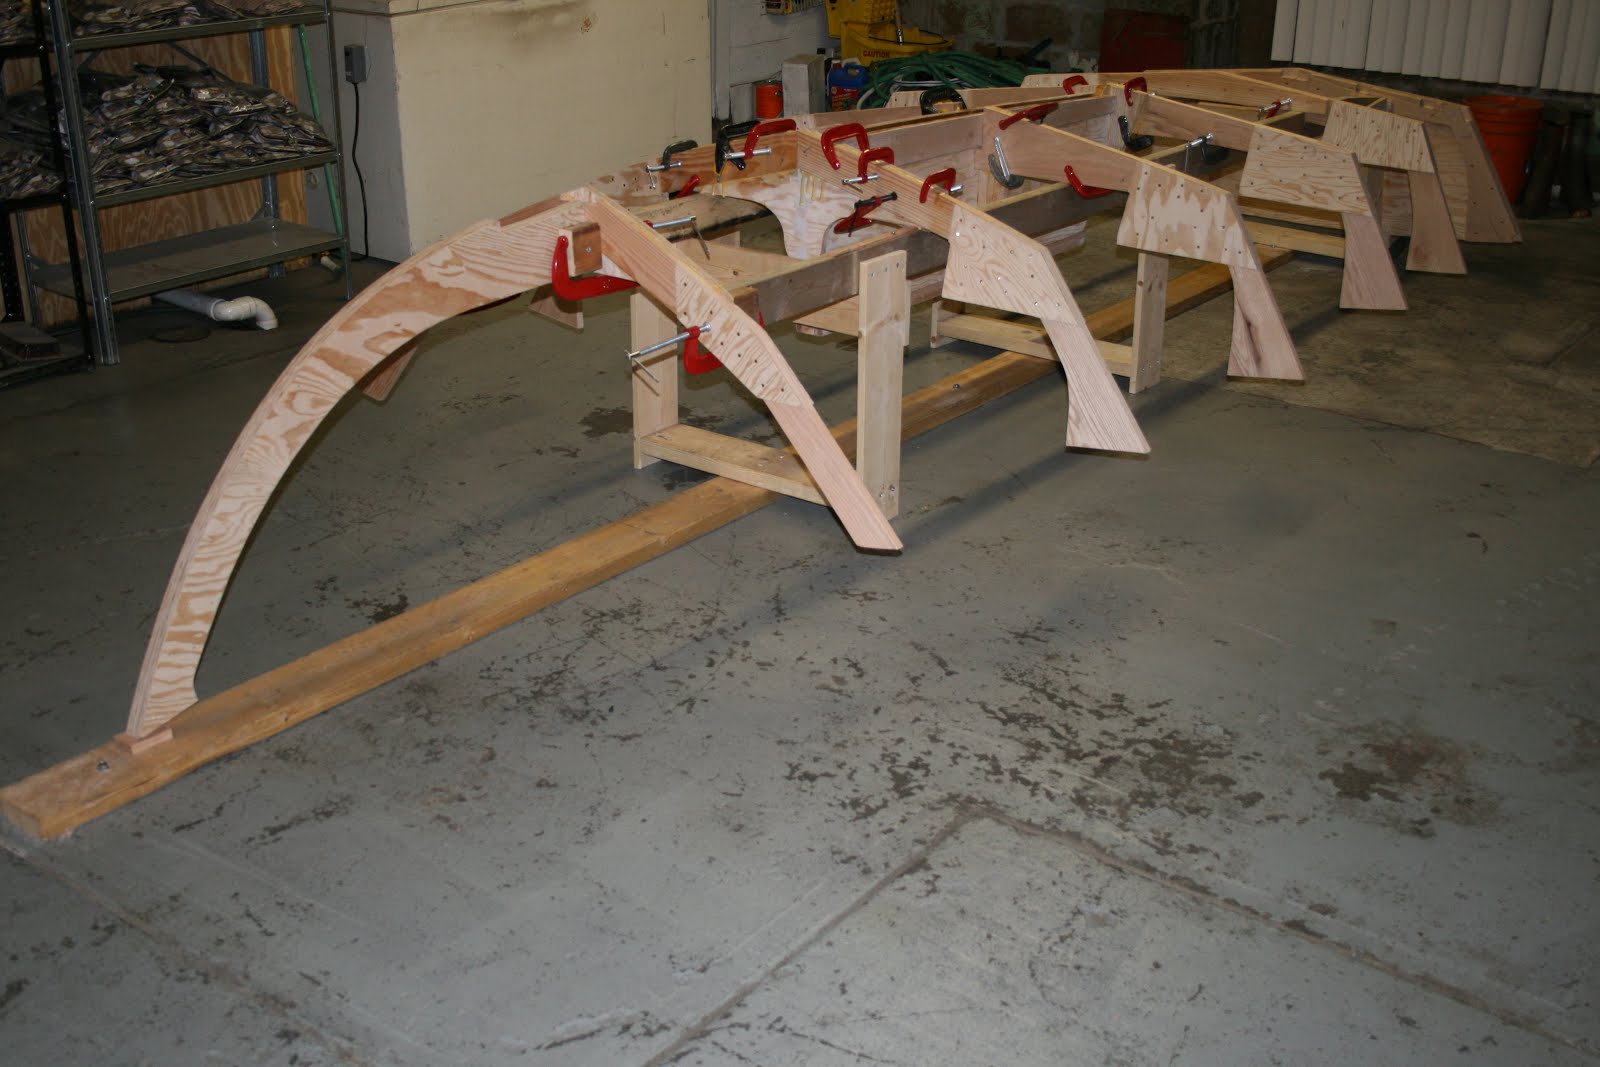
Over the weekend I attached the outside chine logs, I did one on Saturday and the other on Sunday. I let each one dry over night so that I wouldn’t be pulling on the frames and distorting everything I had just worked on before the glue had set up. It all went pretty well although I am not completely sure I did it all right but I will add filler later on during the fairing process. Most of all this gets covered up with plywood and fiberglass and I plan to fiberglass the internal seams around the frames when I flip the boat later. I used some wet towels on the hardest bent part of the boards to help to ease some of the stress on them. I used motorcycle tie down straps and ratchet straps, they worked better than clamps and really pulled it together well.


Thursday, June 12, 2008
Setting the keel and breasthook
Today I worked on setting the keel and checking for center alignment on the frames. I worked on lining it all up first with a string over the middle and it all looked pretty good. I noticed the frames are off the one side a bit and it caused me to have to reset the transom to get it all square. I regretted having to take the transom loose because of the angle it has on it. I did it relatively faster than the first time I mounted it so that was better.
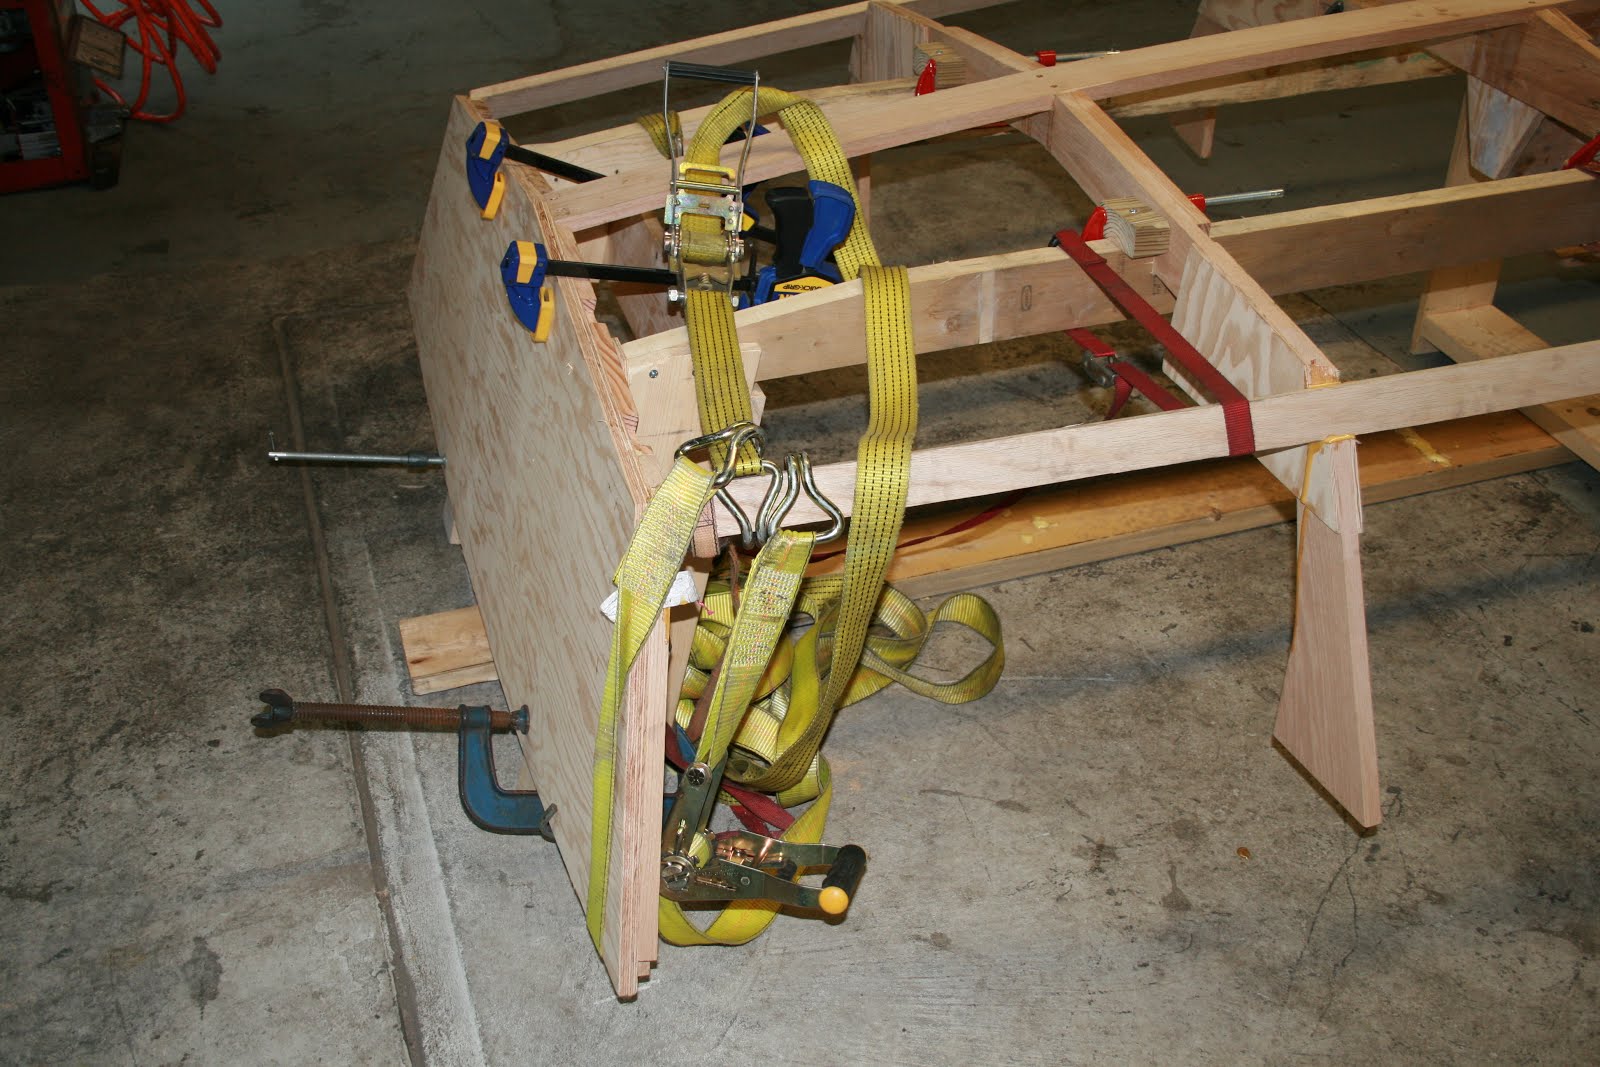
I decided a while back that I would not cut any of the notches in the framing just because I didn’t think it would all line up right. The way I am doing it is to lay the board up on center were I want it on the frames then draw lines around it and then come back and fit them. I did one at a time working my way forward chiseling and sawzall’ing it all. It all worked out well and I mocked up the fitting of the keel before I glued anything. I glued it all up and used straps and clamps to hold it all overnight. I put wedges in centerboard area to be sure the straps did not pull it into the slot I had cut.
I also fit the breast hook and I am having a hard time trying to figure out how to hold the base secure while I work above. I figured after the keel sets up in the glue it will be better. We will see tomorrow.


Wednesday, June 11, 2008
Hanging the centerboard and mounting frames
Ok today I feel like I actually am gaining ground on the build. I think maybe because it looks likes something, maybe like fish ribs, but at least it’s a start. I have the trunk mounted and the outer frames attached to it and lined up. I have glued it all together and tomorrow I will put the screws in it. As I was setting up the frames I came across another problem that took me a while to sit and look at to figure out. In the plans it says the setup member log on frame #1 needs to be flush on the jig and that was a head scratcher. I had laid a board on top of all the frames and it just was not sitting flat on frame #2. At first I thought about cutting a notch in the jig and lowering frame #3 to get the board to sit flatter across the top of the frames. Before I did that I sat and looked at it for a while and thought hey frame #1 is too high and besides it was going to be a steep bend in the plywood to get it to touch the transom. Then I figured it out I need to notch the jig and let the frame drop into it some so that the setup log will rest on top of it properly. After notching and letting it drop down its all nice now and looks really good. I attached a picture of the drop in notch.
Things are moving along pretty well now and I put the stem on the front just to see how square it all was. I will be hard fitting the stem tomorrow, I have clamp on it now. I also am gluing the breast hook together for placement tomorrow also. I have glued together some boards to make the wedge needed for the front of the stem to hole up right and will attempt to cut the angle on it tomorrow.
My sails came in today that I purchased from eBay, I haven’t looked at them yet I did not want to spread them out on the dirty shop floor. I will take them out into the grass tomorrow and have a look.


Tuesday, June 10, 2008
Centerboard Trunk and frame
Today I finished the centerboard trunk; it has been quit the project. It has taken me 4 days to finish, most of the time it was just waiting for things to dry along the way. I have sanded it most of the way so there will be less prep for paint later. I have learned many things about resin and fiberglass by doing the trunk inside section in glass. This will be very useful when I start to do the bottom of the boat later.
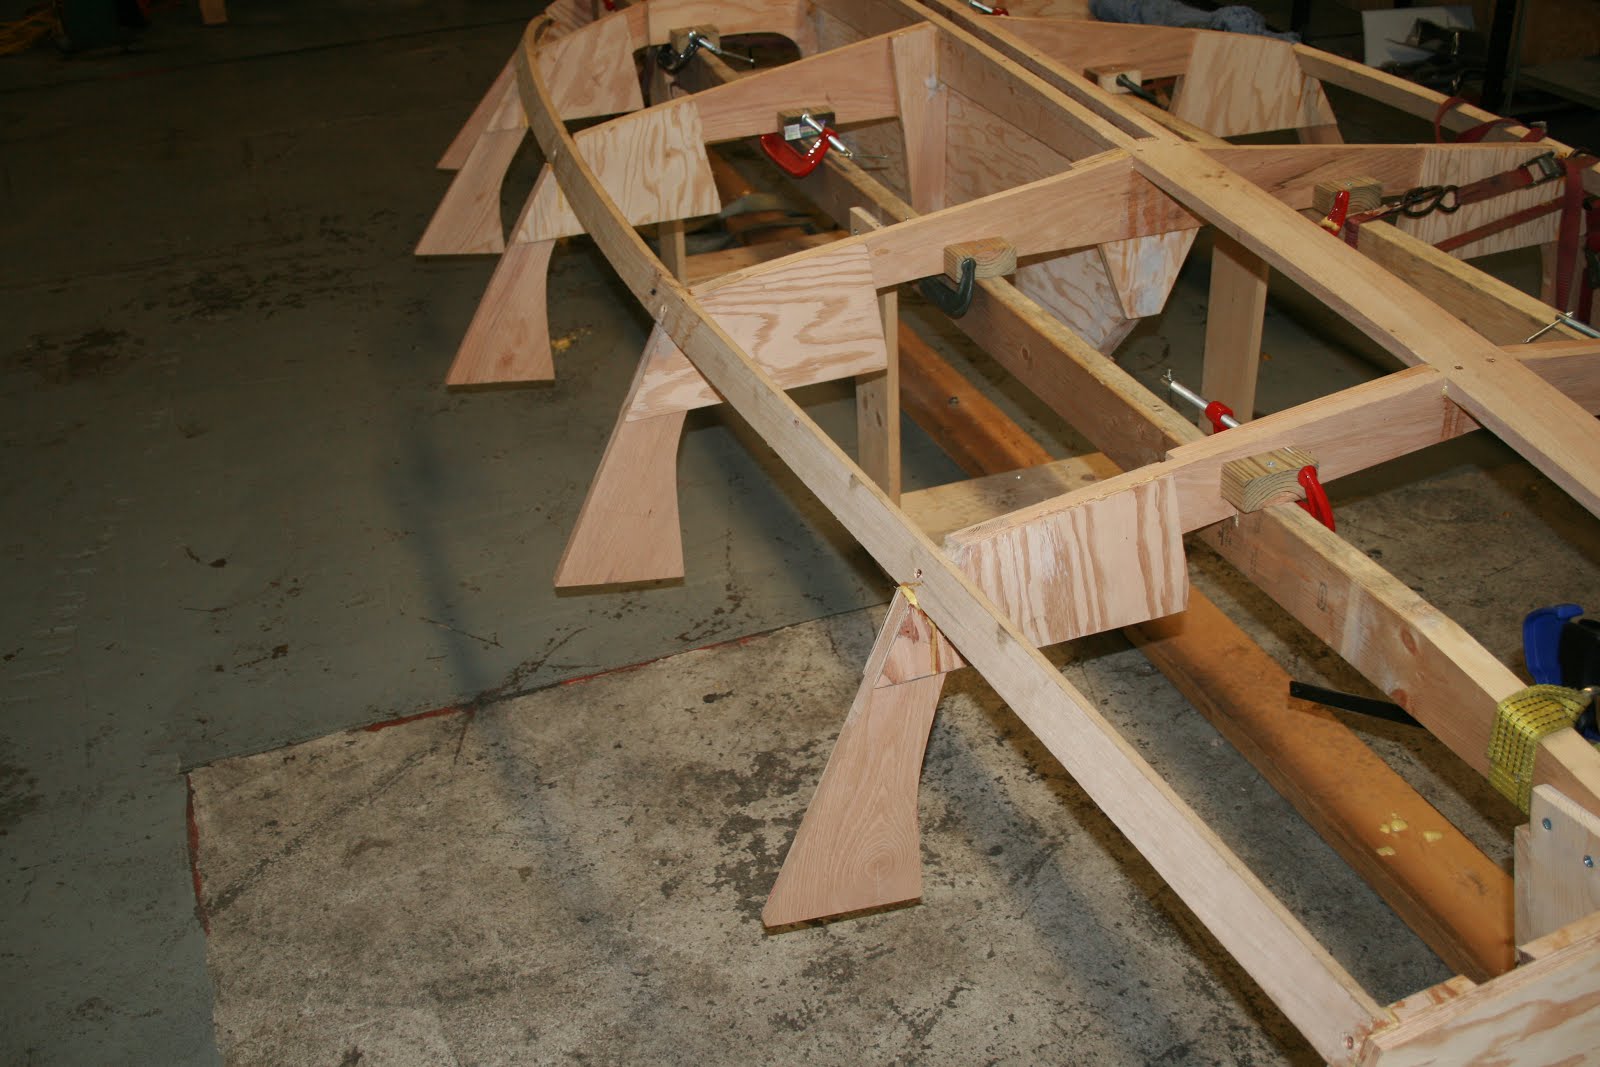
I came up with an idea today to hold my frames on the jig pretty well. I screwed some 2x4 scraps to the jig vertical and then c-clamped from the side of the frames to the side of the 2x4 pieces, (see pictures attached). It worked really well and all is square and secure.
I have the frame mounts attached to the end of the center board trunk for everything to hook to on the jig. Tomorrow I will start to align the frames with the trunk; I am sure its going to be tedious some. I am looking forward to getting all the frames on the jig; it will look like I am doing something I suspect.
I had some time this evening and went ahead and glued part of frame 5 so it can dry overnight. I will glue the other half tomorrow morning so it will be drying during the day. I had to trim the laminated sections back to fit the center log. On the print it does not show doing that but it overlaps and there is no clearance for it on the back side. Attached pictures.


Subscribe to:
Comments (Atom)